
Understanding Your Canon Printer Model
When it comes to connecting your Canon printer to WiFi, the first step is to understand your specific printer model. Knowing your printer model helps you find the right instructions and features. Here are some key points to consider:
Identifying Your Printer Model
- Look for the model number on the front or back of your printer.
- Check the user manual that came with your printer.
- Visit the Canon website for a list of models.
Checking Printer Specifications
- Find out if your printer supports wireless connections.
- Look for details about WiFi capabilities in the manual.
- Make sure your printer is compatible with your WiFi network type (2.4 GHz or 5 GHz).
Understanding Printer Capabilities
- Know what features your printer offers, like scanning or double-sided printing.
- Check if your printer can connect to mobile devices.
- Understand the limits of your printer, such as paper size and print speed.
Understanding your printer model is crucial for a smooth setup process. It ensures you follow the right steps and make the most of your printer's features.
Preparing Your Printer for WiFi Connection
Unboxing and Setting Up
When you first get your Canon printer, it’s important to set it up correctly. Here’s how to do it:
- Carefully remove the printer from the box.
- Take out all the protective materials and packaging.
- Place the printer on a flat, stable surface near your WiFi router.
Make sure you have enough space around the printer for ventilation.
Installing Ink Cartridges and Paper
Before connecting to WiFi, you need to prepare the printer:
- Open the printer cover and insert the ink cartridges.
- Load paper into the paper tray, ensuring it’s aligned properly.
- Close the printer cover securely.
Powering On the Printer
Now that everything is set up, it’s time to power on your printer:
- Plug the printer into a power outlet.
- Press the power button to turn it on.
- Wait for the printer to initialize and be ready for use.
Setting up your printer correctly is the first step to a smooth WiFi connection. Make sure to follow these steps carefully!
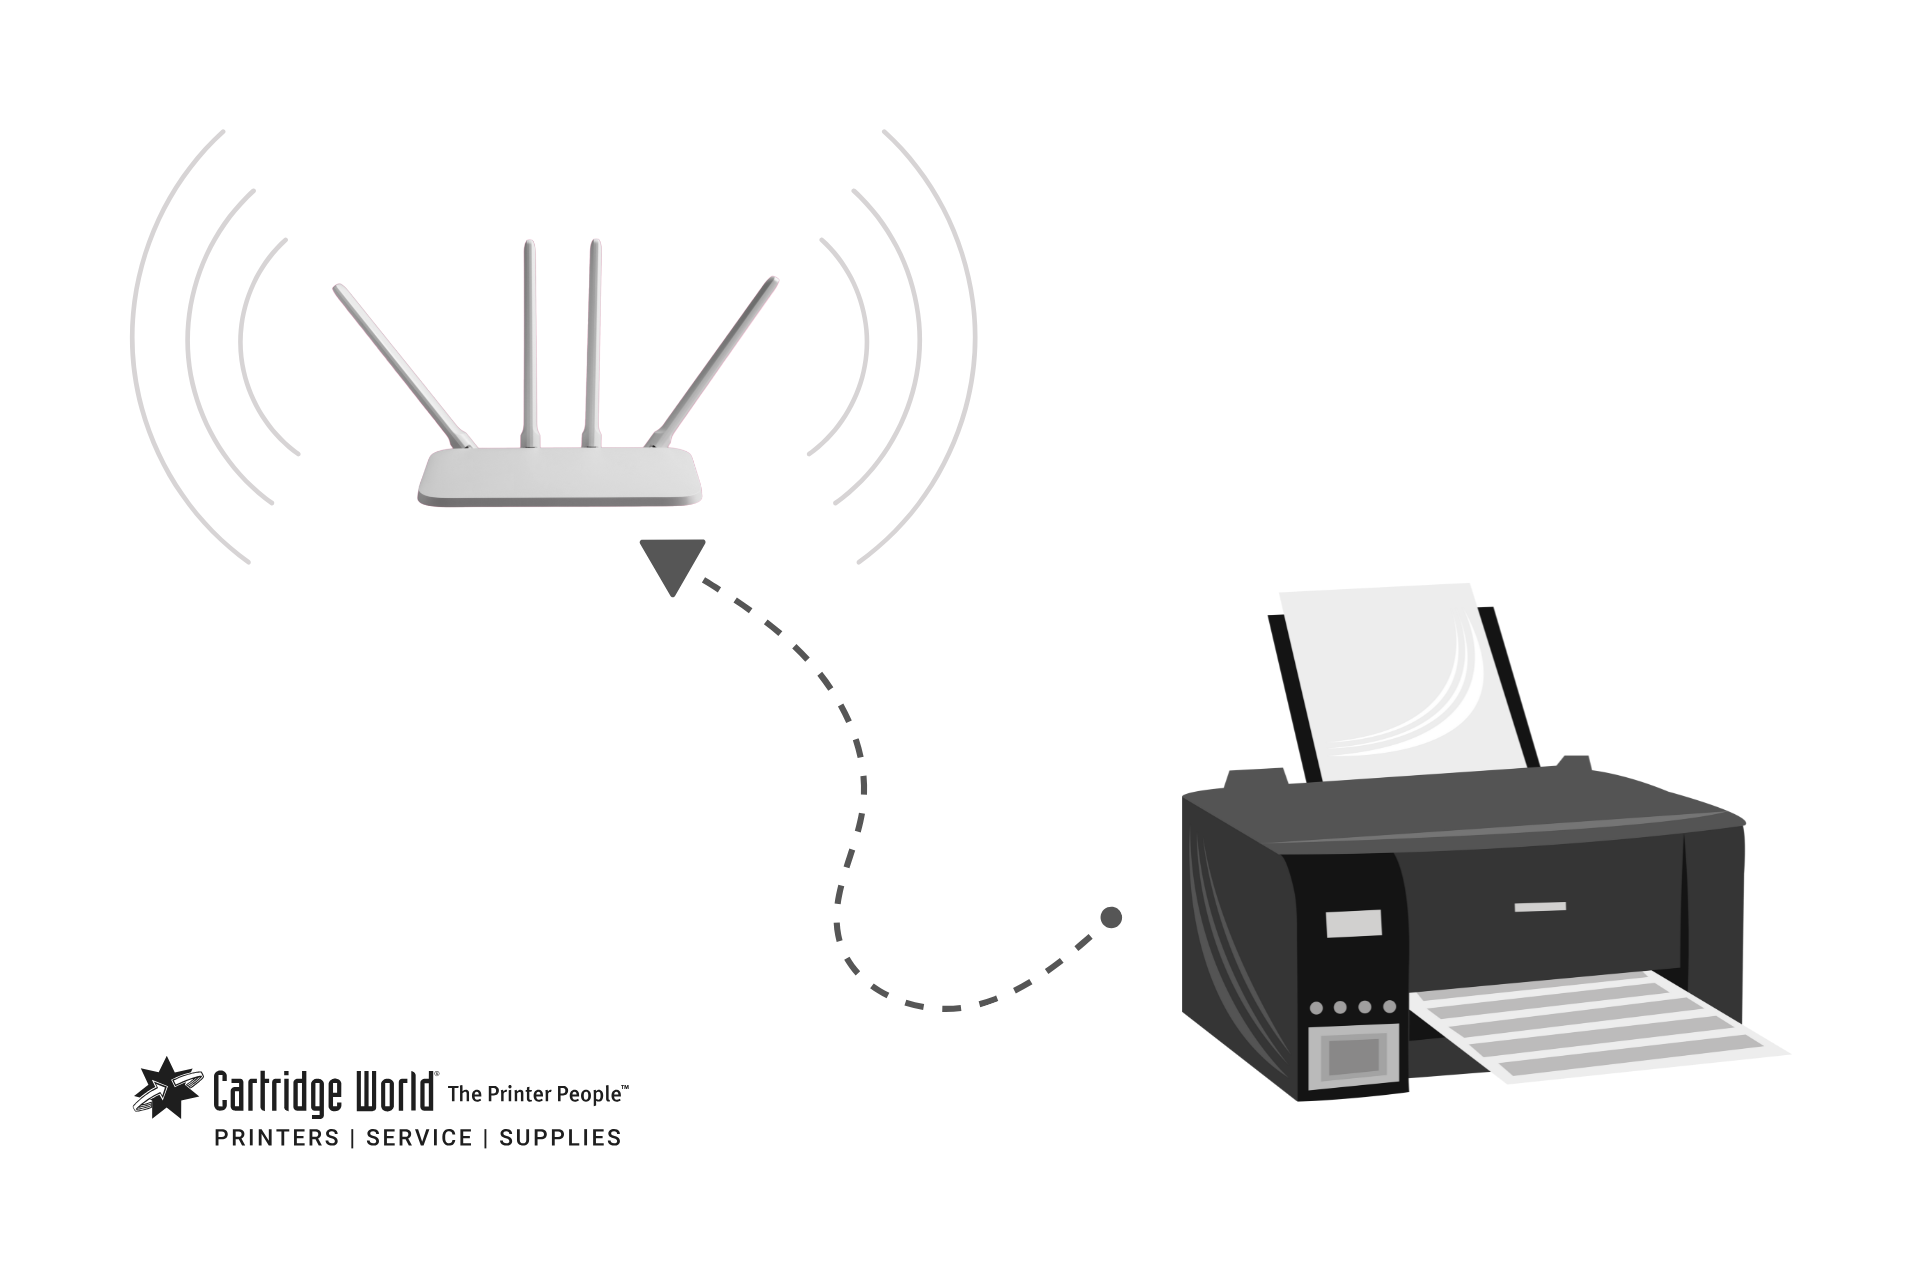
Accessing the Printer's Network Settings
Navigating the Printer Menu
To connect your Canon printer to WiFi, you first need to access the printer's menu. This is where you can find all the settings you need. Here’s how to do it:
- Turn on your printer and wait for it to start up.
- Press the ‘Menu’ button on the printer’s control panel.
- Use the arrow keys to scroll through the options until you find ‘Settings’ or ‘Network’.
Locating Network Settings
Once you are in the settings menu, you need to find the network settings. This is crucial for connecting to WiFi. Follow these steps:
- Look for an option labeled ‘Network Settings’ or ‘Wireless LAN Setup’.
- Select this option to view the available network settings.
- You may see options for both wired and wireless connections.
Understanding Network Options
Understanding the different network options available on your printer is important. Here are some common terms you might encounter:
- WPS (Wi-Fi Protected Setup): A quick way to connect your printer to your WiFi without entering a password.
- SSID (Service Set Identifier): This is the name of your WiFi network.
- IP Address: A unique address that identifies your printer on the network.
Remember, accessing the network settings is the first step to connecting your printer to WiFi. Make sure to take your time and follow the instructions carefully.
Connecting Your Printer to WiFi Using WPS
What is WPS?
WPS stands for Wi-Fi Protected Setup. It is a simple way to connect your printer to your WiFi network without needing to enter a password. This method is quick and secure, making it a popular choice for many users.
Steps to Connect Using WPS
To connect your Canon printer to WiFi using WPS, follow these steps:
- Locate the WPS button on your wireless router. It is usually labeled as "WPS" or has a symbol that looks like two arrows forming a circle.
- On your printer, go to the menu and find the option for WPS connection. This may be under the network settings.
- Press the WPS button on your router.
- Within two minutes, select the WPS option on your printer. The printer will start connecting to the WiFi network.
- Wait for a confirmation message on the printer's display that indicates a successful connection.
Troubleshooting WPS Connection
If you encounter issues while connecting your printer using WPS, consider these tips:
- Ensure that your printer and router are close to each other during the setup.
- Check if the WPS feature is enabled on your router.
- Restart both your printer and router, then try the connection process again.
Using WPS is a fast and easy way to connect your printer to WiFi. If you follow the steps carefully, you should be able to set it up without any problems.
Connecting Your Printer to WiFi Using Standard Setup
Accessing Standard Setup
To connect your Canon printer to WiFi using the standard setup, you first need to access the printer's control panel. Here’s how to do it:
- Turn on your printer and make sure it’s ready.
- Press the ‘Menu’ button on the printer.
- Use the arrow keys to navigate to the ‘Network’ or ‘Wireless’ settings.
Entering WiFi Network Details
Once you are in the network settings, you will need to enter your WiFi details. Follow these steps:
- Select ‘Wireless LAN Setup’ from the menu.
- Choose ‘Standard Setup’ to start the process.
- Find your WiFi network from the list and select it.
- Enter your WiFi password carefully. Make sure it’s correct!
Confirming the Connection
After entering your WiFi details, it’s time to confirm the connection:
- The printer will attempt to connect to the WiFi network.
- Wait for a message that says the connection was successful.
- Print a test page to ensure everything is working properly.
Connecting your printer to WiFi can make printing easier and more convenient. Always double-check your WiFi password to avoid connection issues.
Connecting Your Printer to WiFi Using Canon PRINT App
Downloading the Canon PRINT App
To start, you need to download the Canon PRINT app on your smartphone or tablet. This app is available for both iOS and Android devices. Here’s how to get it:
- Open the App Store or Google Play Store on your device.
- Search for "Canon PRINT".
- Tap on the download button and install the app.
Setting Up the App
Once you have the app, follow these steps to set it up:
- Open the Canon PRINT app.
- Create an account or log in if you already have one.
- Allow the app to access your device’s location and WiFi settings.
This will help the app find your printer easily.
Connecting Through the App
Now that the app is set up, you can connect your Canon printer to WiFi:
- Make sure your printer is powered on and within range of your WiFi network.
- In the app, select "Add Printer".
- Choose your printer from the list and follow the on-screen instructions to enter your WiFi details.
- Confirm the connection and wait for the app to notify you when the setup is complete.
Using the Canon PRINT app makes it simple to connect your Canon printer to WiFi. With just a few taps, you can setup wifi on Canon printer easily and start printing from your mobile device.

Verifying the WiFi Connection
Printing a Test Page
To ensure your Canon printer is connected to WiFi, start by printing a test page. This is a simple way to check if everything is working correctly. Here’s how to do it:
- Go to the printer’s menu.
- Select the option for printing a test page.
- Wait for the printer to finish printing.
If the test page prints successfully, your printer is connected to the WiFi!
Checking Connection Status on Printer
Next, you can check the connection status directly on your printer. Follow these steps:
- Access the network settings from the printer menu.
- Look for a section that shows the WiFi status.
- Confirm that it indicates a successful connection.
Ensuring Stable WiFi Connection
Finally, it’s important to make sure your WiFi connection is stable. Here are some tips:
- Keep the printer close to the router to avoid weak signals.
- Avoid placing the printer near walls or large metal objects that can block the signal.
- Regularly check your internet connection to ensure it’s working well.
Regular checks can help you catch any issues early, ensuring your printer stays connected and ready to use.
Troubleshooting Common Connection Issues
When your Canon printer struggles to connect to WiFi, it can be frustrating. Here are some common problems and how to fix them:
Identifying Common Issues
- Printer not found on the network: Ensure the printer is powered on and within range of the router.
- Weak signal strength: Check if there are obstacles between the printer and the router.
- Incorrect WiFi password: Double-check that you entered the right password during setup.
Steps to Resolve Connection Problems
- Restart your printer and router to refresh the connection.
- Re-enter your WiFi details in the printer settings.
- Make sure your printer's firmware is up to date.
When to Seek Professional Help
If you’ve tried the above steps and your printer still won’t connect, it might be time to get help. Consider contacting Canon support or a local technician.
Remember, a stable WiFi connection is essential for your printer to work properly. Regular checks can save you from future headaches.
Maintaining Your Canon Printer's WiFi Connection
Regularly Updating Firmware
Keeping your printer's firmware up to date is essential for smooth operation. Regular updates can fix bugs and improve performance. To update your firmware:
- Check the Canon website for the latest version.
- Follow the instructions provided for downloading and installing updates.
- Restart your printer after the update to ensure changes take effect.
Ensuring Network Stability
A stable network connection is crucial for your printer to work effectively. Here are some tips to maintain a strong WiFi connection:
- Place your router in a central location to reduce interference.
- Avoid physical barriers like walls and furniture between the printer and router.
- Regularly check your internet speed to ensure it meets the requirements for printing.
Reconnecting After Network Changes
If you change your WiFi network or password, you will need to reconnect your printer. Follow these steps:
- Access the printer's network settings from the menu.
- Select the new WiFi network and enter the password.
- Confirm the connection and print a test page to ensure everything is working.
Maintaining your Canon printer's WiFi connection is key to enjoying hassle-free printing. Regular checks and updates can save you time and frustration.
Advanced WiFi Connection Options
Using a WiFi Extender
A WiFi extender can help boost your printer's connection, especially if it's far from the router. Here’s how to use one:
- Choose a good location for the extender, ideally halfway between your printer and the router.
- Plug it in and follow the instructions to connect it to your WiFi network.
- Connect your printer to the extended network, just like you would with your main WiFi.
Setting Up a Static IP Address
Setting a static IP address can help your printer stay connected without interruptions. Here’s how:
- Access your router settings through a web browser.
- Find the section for DHCP and look for your printer’s current IP address.
- Assign a static IP by entering the desired address and saving the changes.
Connecting Through a Wireless Router
If you want a more stable connection, you can connect your printer directly to your wireless router. Follow these steps:
- Locate the WPS button on your router.
- Press the WPS button and then the corresponding button on your printer.
- Wait for the connection to establish, which usually takes a few moments.
Using advanced options can greatly improve your printer's WiFi connection. Always ensure your devices are updated to avoid any compatibility issues.
Conclusion
Connecting your Canon printer to Wi-Fi is a simple task that can make printing much easier. By following the steps outlined in this article, you can quickly set up your printer to work wirelessly. This means you can print from anywhere in your home without needing to connect with cables. If you run into any problems, don’t hesitate to check the printer’s manual or the Canon website for help. Enjoy the convenience of wireless printing!
Contact Us
Most Popular
Recommended For You